
I was recently tasked with the challenge of creating ZIP files in Salesforce and saving them as attachments on records. In case you didn’t know, Salesforce doesn’t natively support doing this seemingly simple task within Apex. That means I was left to come up with a more clever solution…
The goal of this particular project was to create a number of XML files, then zip them up and attach the ZIP file to a record. The ZIP file would then be sent to a third-party service for processing. While this is a somewhat specific use case, there are a lot of other use cases where it might be necessary to create ZIP files in Salesforce.
For the purposes of this post, let’s imagine that we want to add a button to the Account object in Salesforce. The output of the button will be a ZIP file attached to the Account record, and the ZIP will contain a list of XML files corresponding to each Opportunity on the Account. To do this, we will need to create an Apex Class and a Visualforce Page. Since Apex can’t create ZIP files, we’ll be doing this with JavaScript that is run in the Visualforce Page.
Let’s start with the Apex Class. The Class is a custom controller that will be used by the Visualforce Page for querying records, building the XML files, and saving the ZIP file as an attachment. When the controller is instantiated it uses the Account ID, which is passed in as a query parameter, to query for the Account’s name and formulate a filename for the ZIP file. There are two other important methods in this class – getXMLFiles and saveData. Both of these are Remote Action methods that will be used by JavaScript code inside the Visualforce Page. getXMLFiles is used to query for the related Opportunities, then to create the XML files in memory. Ultimately, it returns an object containing the XML data and filenames for each Opportunity.
Next we have to create a Visualforce Page that can utilize the Apex Class. Notice that the bulk of this page is JavaScript code; the only real HTML content is a simple item for displaying success and error messages. There are two external JavaScript libraries that are used – JQuery and JSZip. JSZip is the library that will enable us to easily create a ZIP file from within the JavaScript code. The JavaScript code starts by calling the controller’s getXMLFiles method. It loops through each XML file that is returned and adds them to an in-memory ZIP file. Once complete, the ZIP file is sent back to Salesforce via the saveData method and saved as an Attachment. Any errors encountered along the way are caught and displayed to the user. If there aren’t any errors, a simple success message is displayed and the user is redirected back to the Account record from which they came.
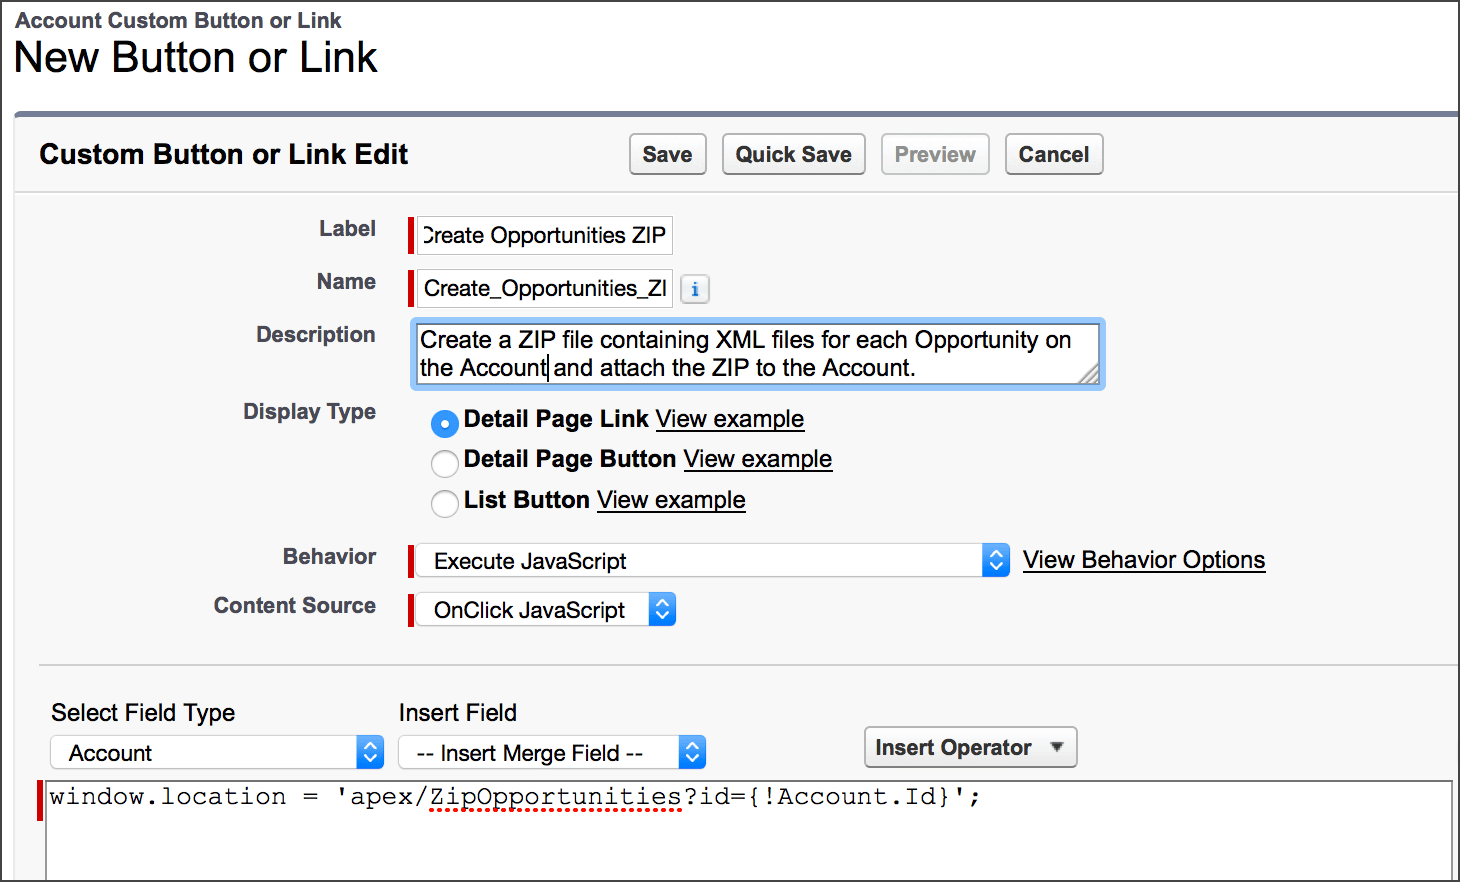
The final step is the easiest–simply create a custom button and add the button to the Account page layout. The button will load the new Visualforce Page and initiate the ZIP file creation. Below is a screenshot of the button configuration. Try it out for yourself, and let me know what you think of my solution for creating ZIP files in Salesforce in the comments below!